Hagstrom Swede 02 Repair Take 1
2025
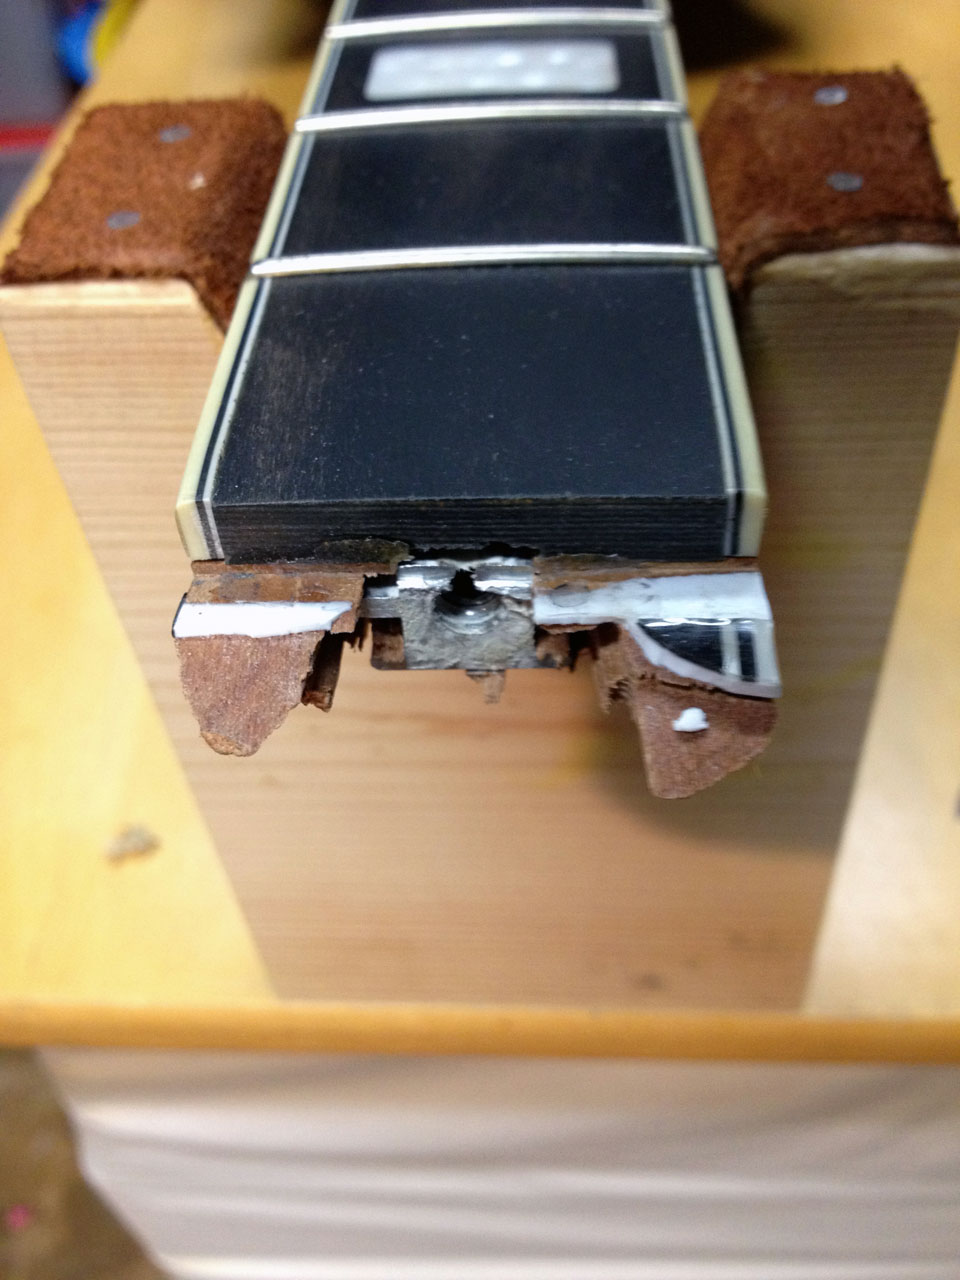
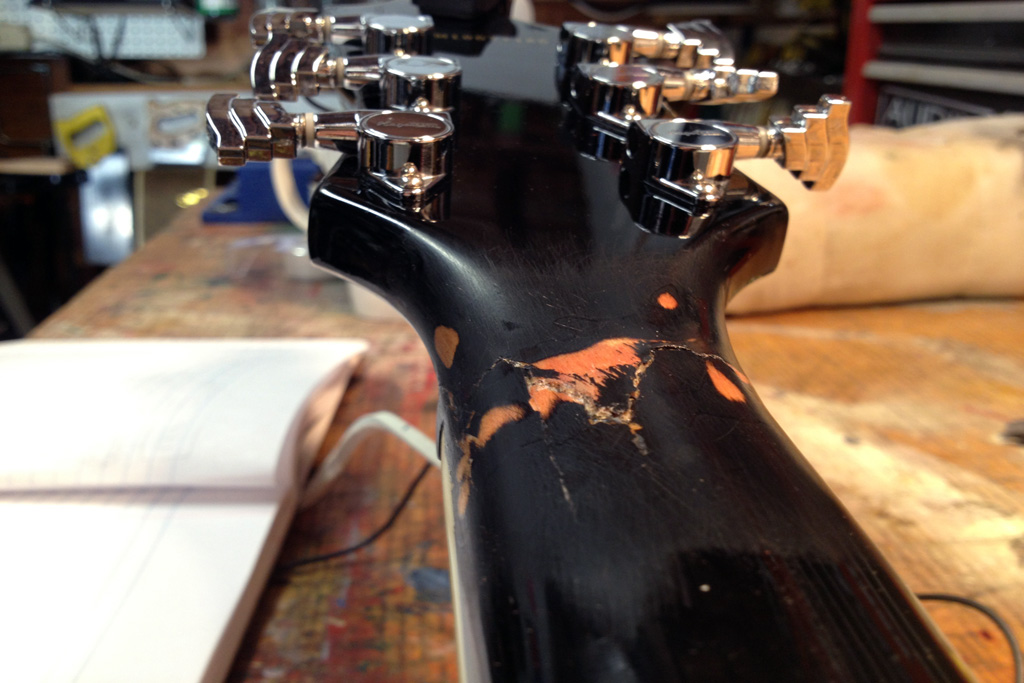
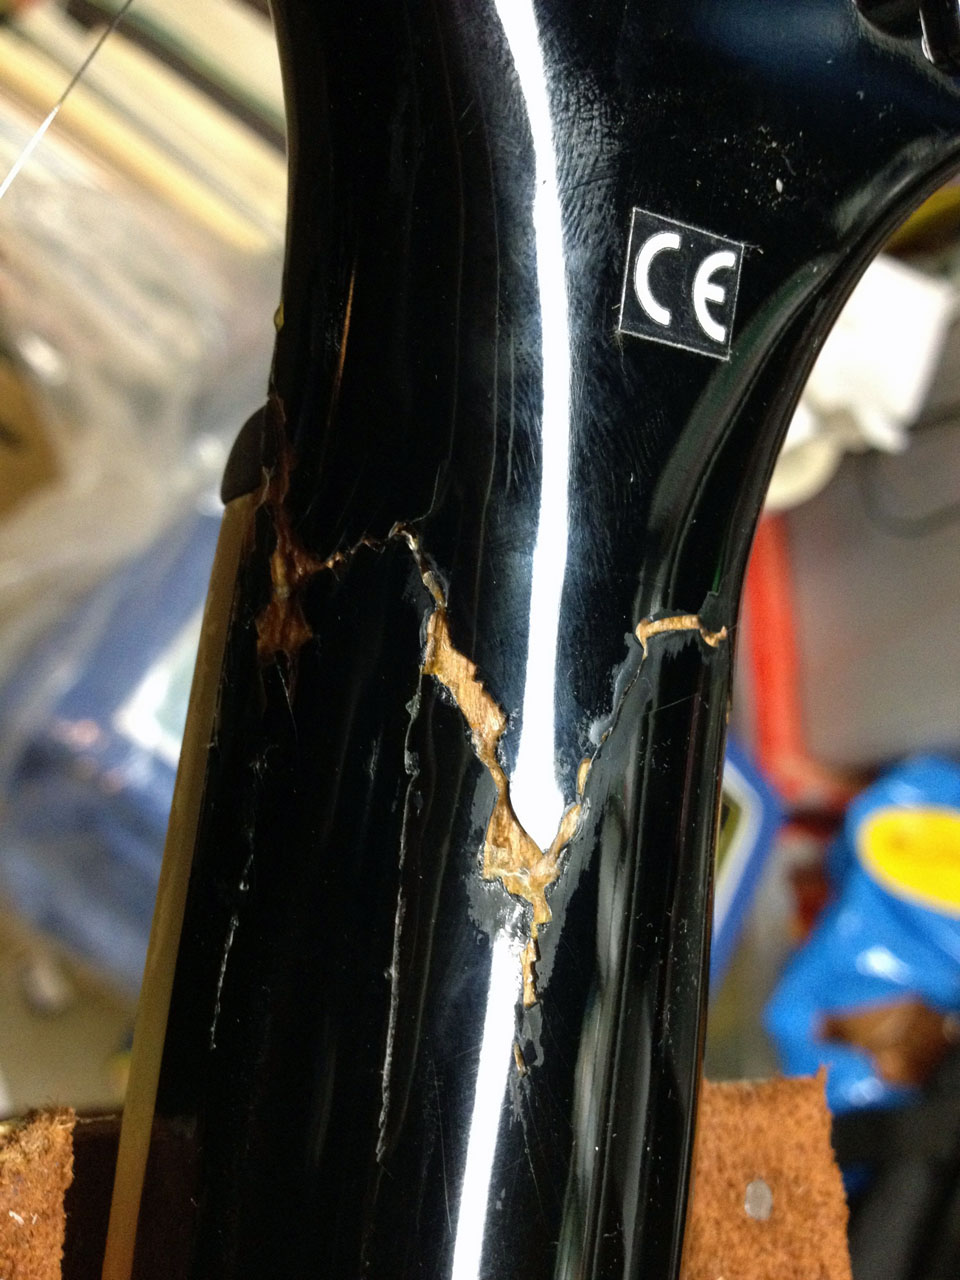

It was immediately apparent that there wasn't a lot of wood surface to use to glue the headstock back to the neck. It's the Achille's heel of these type of set neck guitars (Les Pauls, as well). This neck was already pretty thin so I didn't have much hope it would be a player. The rest of the guitar (notwithstanding the missing bits) was in pretty good shape, save a few nicks in the finish on the top and back of the guitar. Should be possible to buff those out. I was falling hard for the gray and silver look of this baby.
What a nerve wracking process it can be to glue guitars back together. You've got one shot and only one shot. If it's not perfect, it's not going to work, etc. First is the debate on what glue to use, PVC, wood glue, etc. I decided that if this was going to work at all, it would be with wood glue. I'm not a fan of PVC glue. It's a mess, it's toxic and it's expensive. It's incredibly strong, so I thought it might help the fact that there's not much wood contact surface here, but in the end, even with wood glue, the joint (ideally) is stronger than the wood, so Titebond II it was.
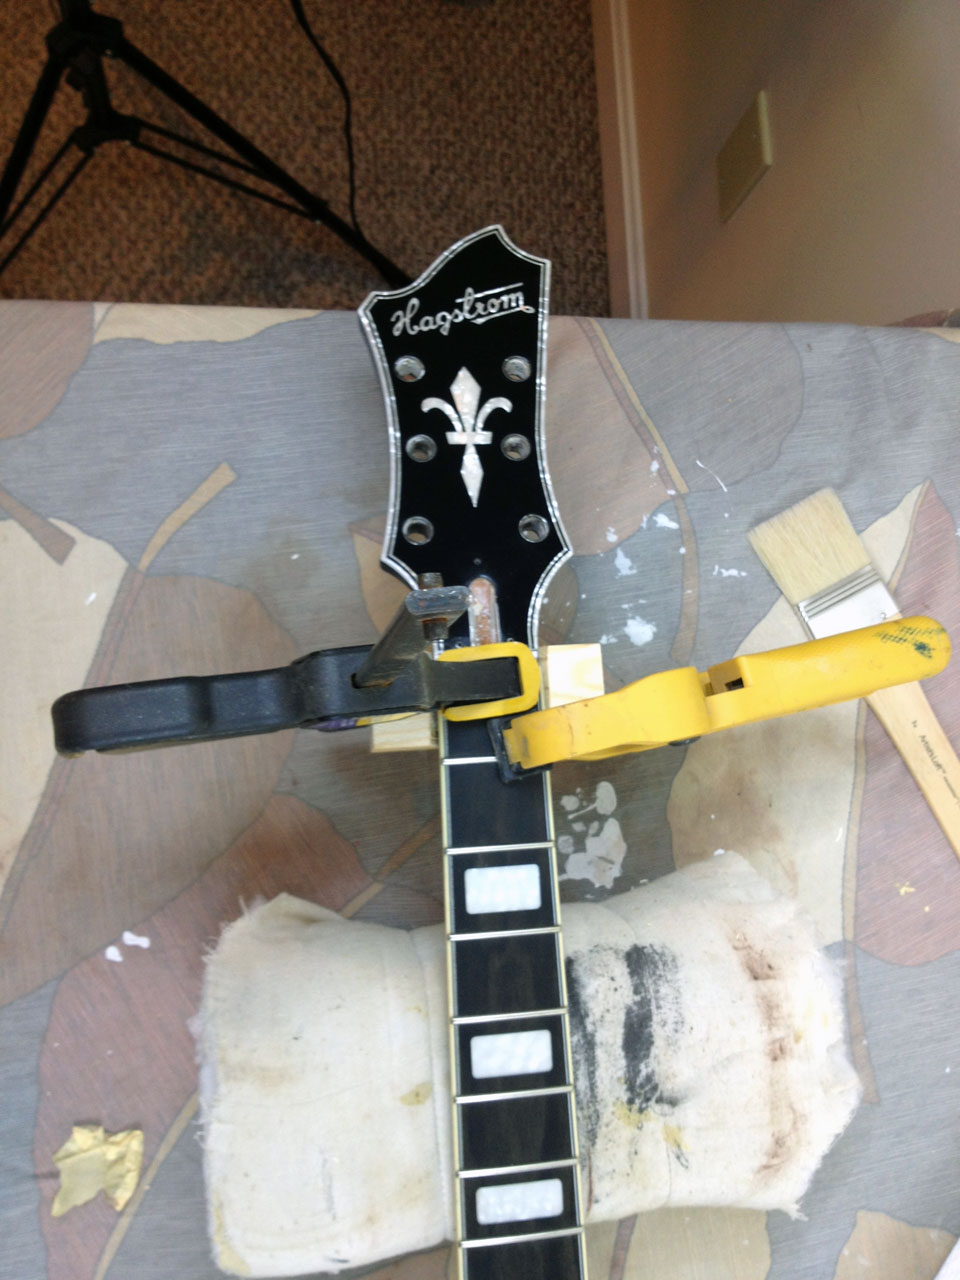
Suprisingly, I didn't need every clamp in my arsenal for this as is normal. Luckily I have a wood block that cradles a guitar neck nicely, which gave me a flat bottom for the clamp and I used the fretboard for the top.
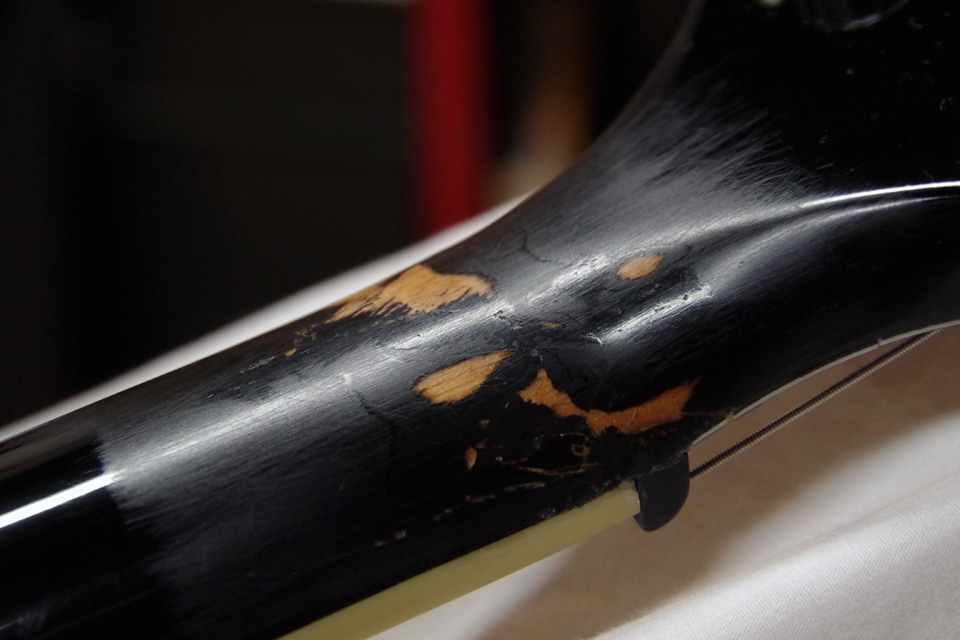
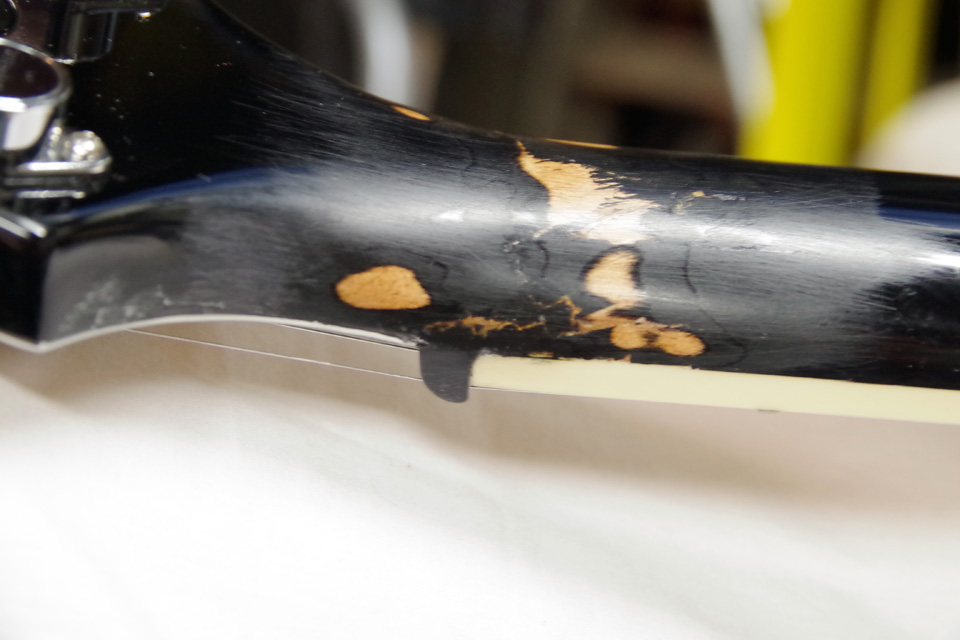
The tough part was the dry fit (which you should ALWAYS do before a glue up). Since the wood was so fractured and splintered, it took a good hour to clean out the bent bits (i.e., those that wouldn't mate perfectly when put back together) with an exacto knife. Even after all of that, when I got a completely solid fit, it still looked like there was going to be a 1/16 inch gap, but I couldn't see why. After puzzling over it for another 30 minutes I decided to go with my gut, which was telling me that despite the visual evidence this was mated up tight and wasn't going anywhere.
Just slapped some glue around all of the surfaces, making sure to get everything wet and drip some down in the crevices. Then I squeezed the headstock back into the neck for all I was worth, wiped down the squeeze, clamped, unclamped, wiped down again, then final clamp. This last bit is important, since you'll get most of your squeeze after you put the clamp on. Since I was working with wood glue I really didn't need to be too careful.
After that, took a deep breath, set it down in the basement (my workshop is too cold this time of year to do this sort of work) and left it for 24 hours.
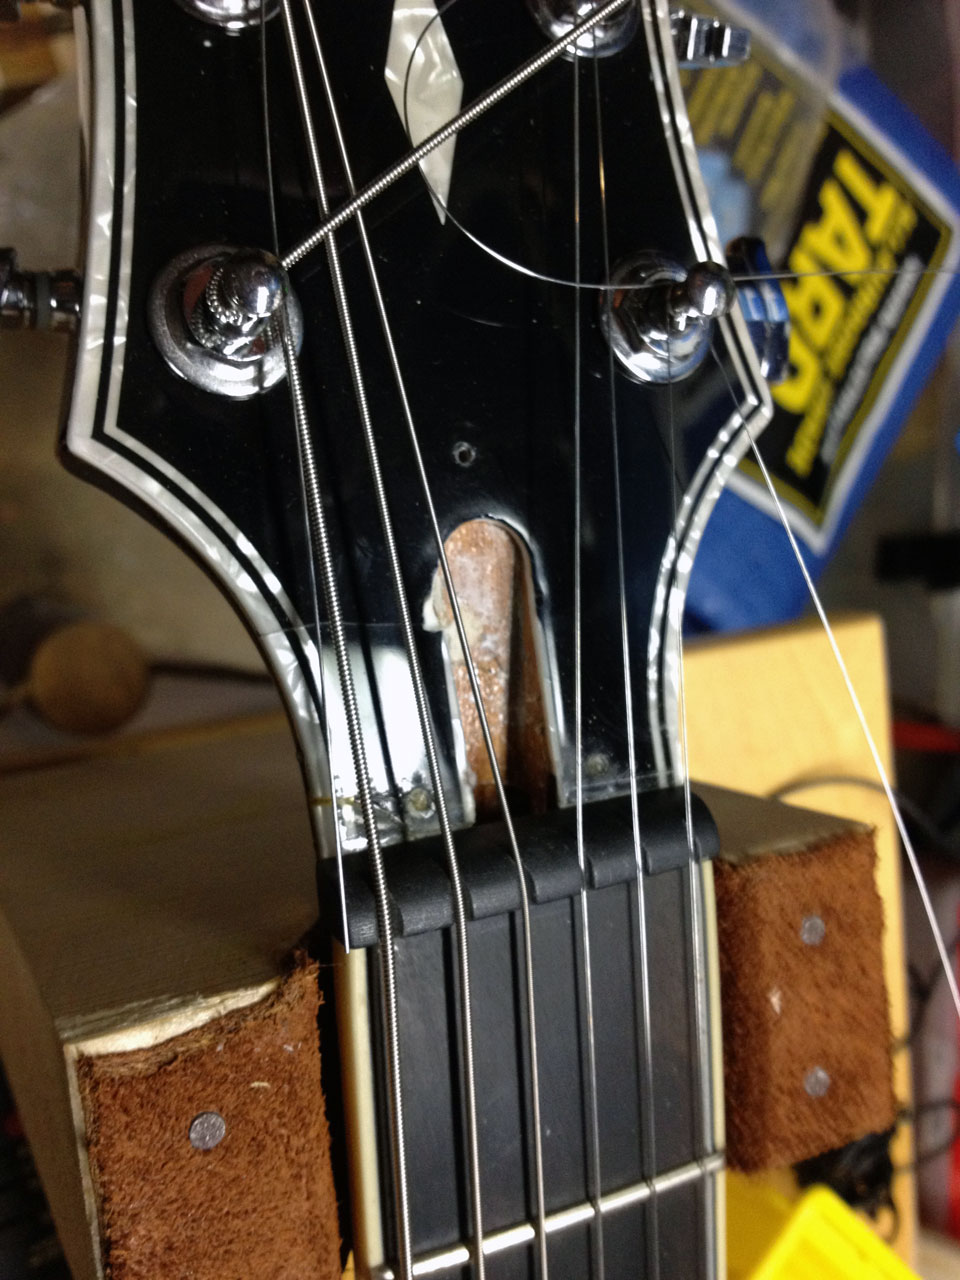
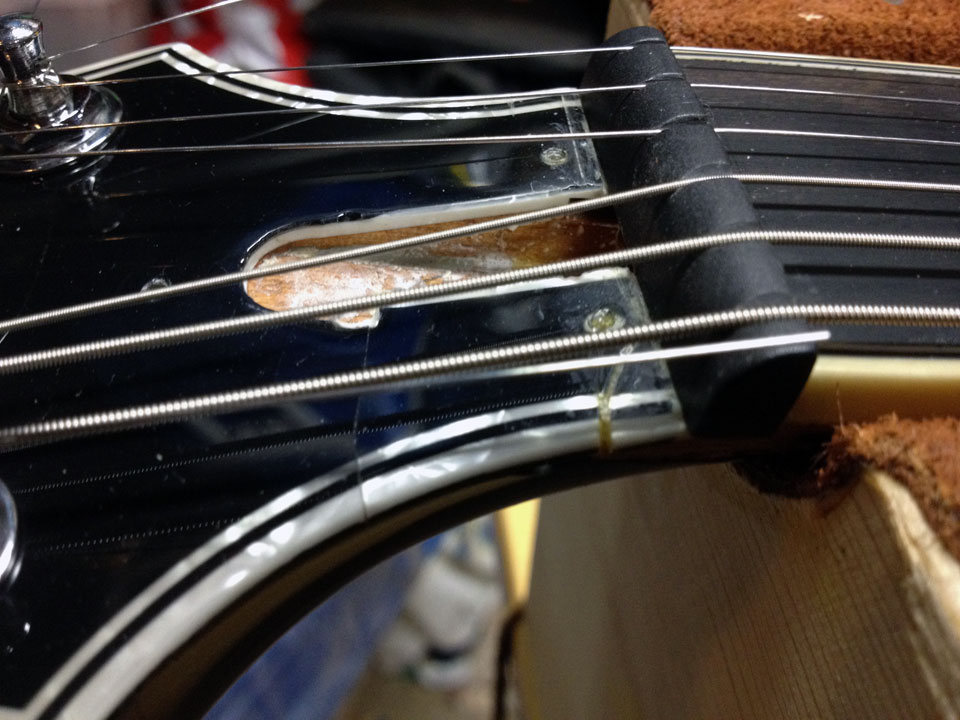
I was quite anxious to find out whether the glue up held. I poked and pushed and pulled and could see no movement whatsoever from the joint, so I was encouraged. The next step was to string it up and see if it would hold tension. I realized about 5 minutes in, I had no idea how to string this beast. I've been around guitars my whole life, but have never seen the type of setup the Hagstrom uses. There's a picture below of what I ended up with. Thankfully there were some closeup pictures of another guitar that clued me in. It wasn't rocket science, but they sure tried. Not sure whether this setup positively impacts the tone of the guitar, but it sure seems needlessly complicated, even compared to a Les Paul.
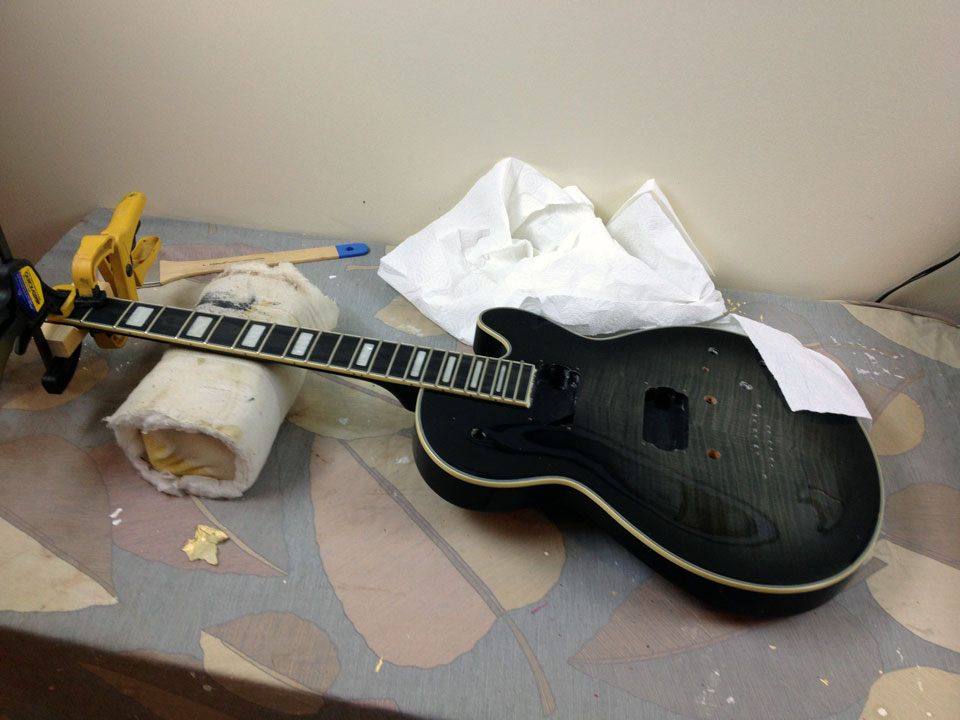
It was one of my more nerve-wracking string ups and I took my time. I used a set of tens with heavier-than-usual bass (hybrid slinkys) that I had laying around since I knew that even if this worked, I'd just have to take the strings off again to be able to put it together. I was able to string it up successfully, bring it up to tune and then I let it sit overnight. The next day, came back and it was remarkably close to pitch. Good enough for me to know that this guitar may play again.
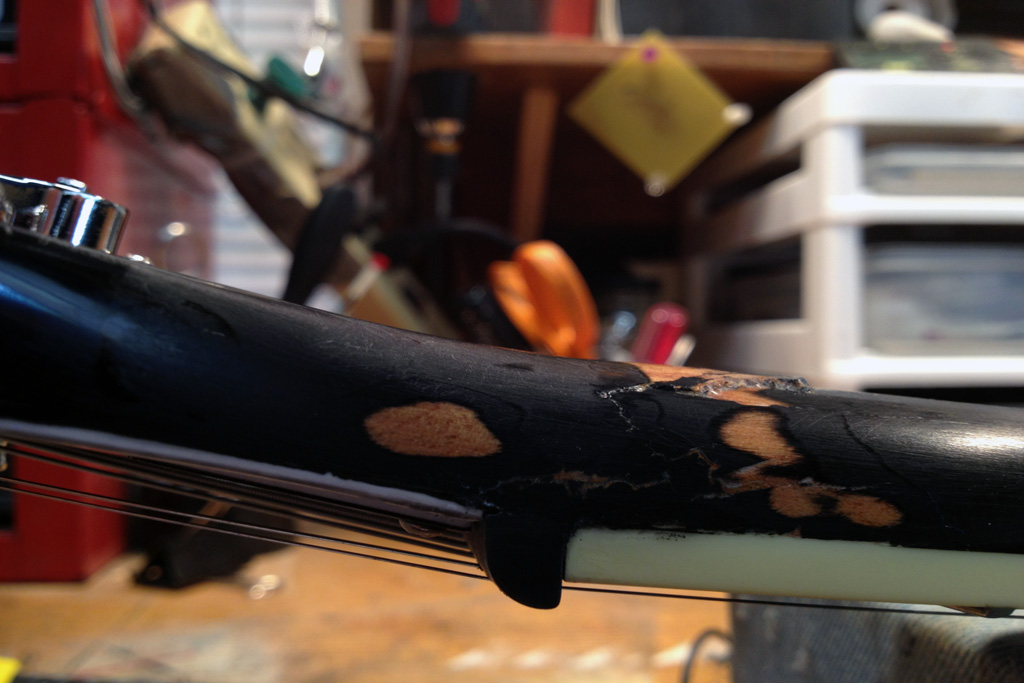
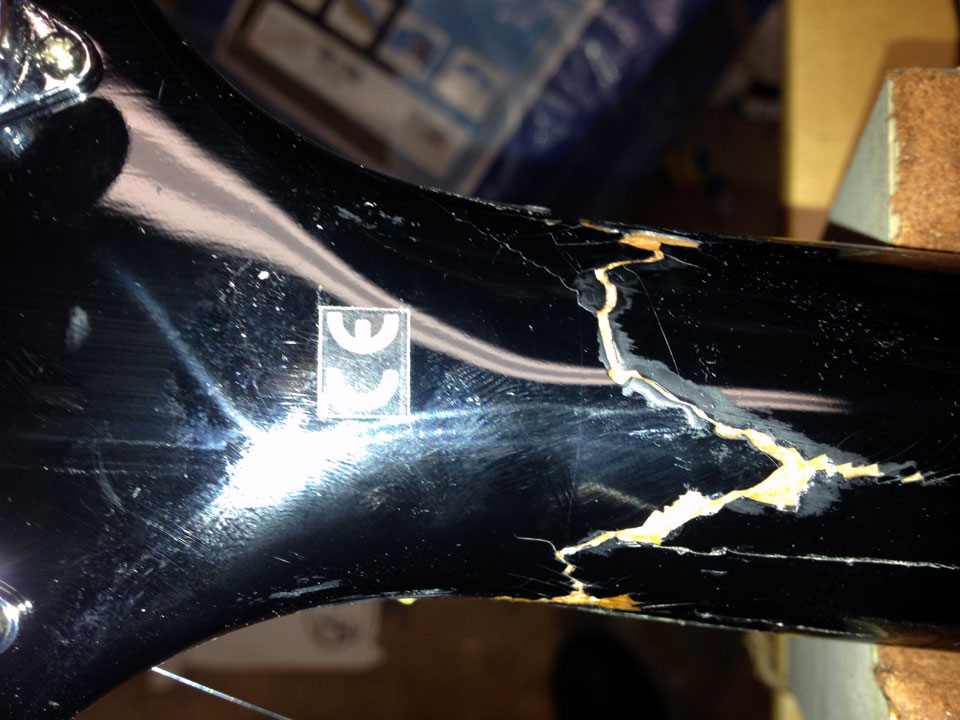
If you look at the pictures, you'll see the finish gap where the joint is. That was one of the clues that was causing me doubt in the dry fit and glue up of the last step. Technically it doesn't matter if the headstock is a bit too long anyway, since the nut is what is important to the intonation (it's the break point) and that part of the headstock was still intact. The joint looks plenty ugly, but that's a relatively easy job to fix. I'll color some super glue, fill in those black gaps on the back of the neck, and sand it down. Since it's too cold to paint outside, I'll likely just leave the back of the neck sanded smooth and perhaps shoot it gloss black again in the Spring. Luckily the truss rod cover will hide some of the damage on the face of the headstock, and I'll do a bit of smoke and mirrors to make the celluloid binding match up. I don't know if it will be invisible, but from a few feet away you shouldn't be able to tell this guitar was ever broken once I'm finished.
I'm more tempted than ever to keep this one for myself.
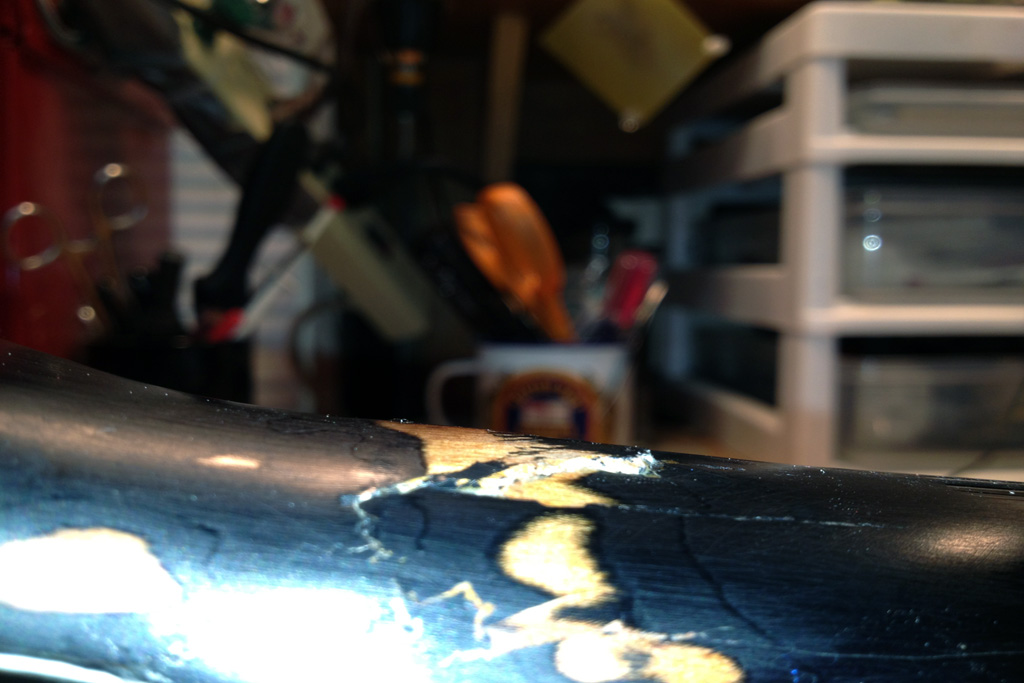
These are progress shots of the neck joint that was broken. The first two are the before, then after the glue-up (at this point the instrument was playable).
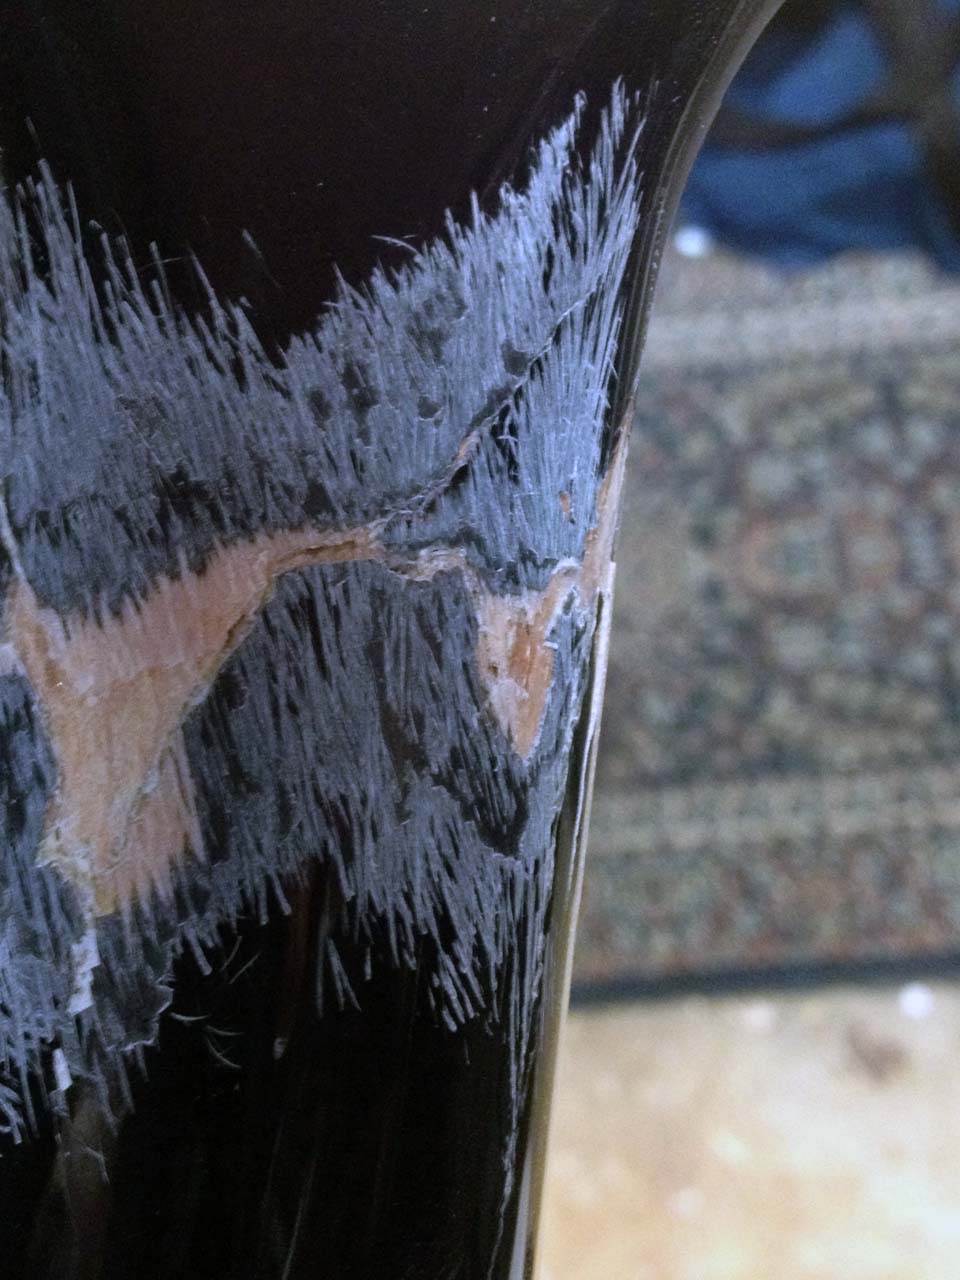
The next was after using a rasp to level out the joint.
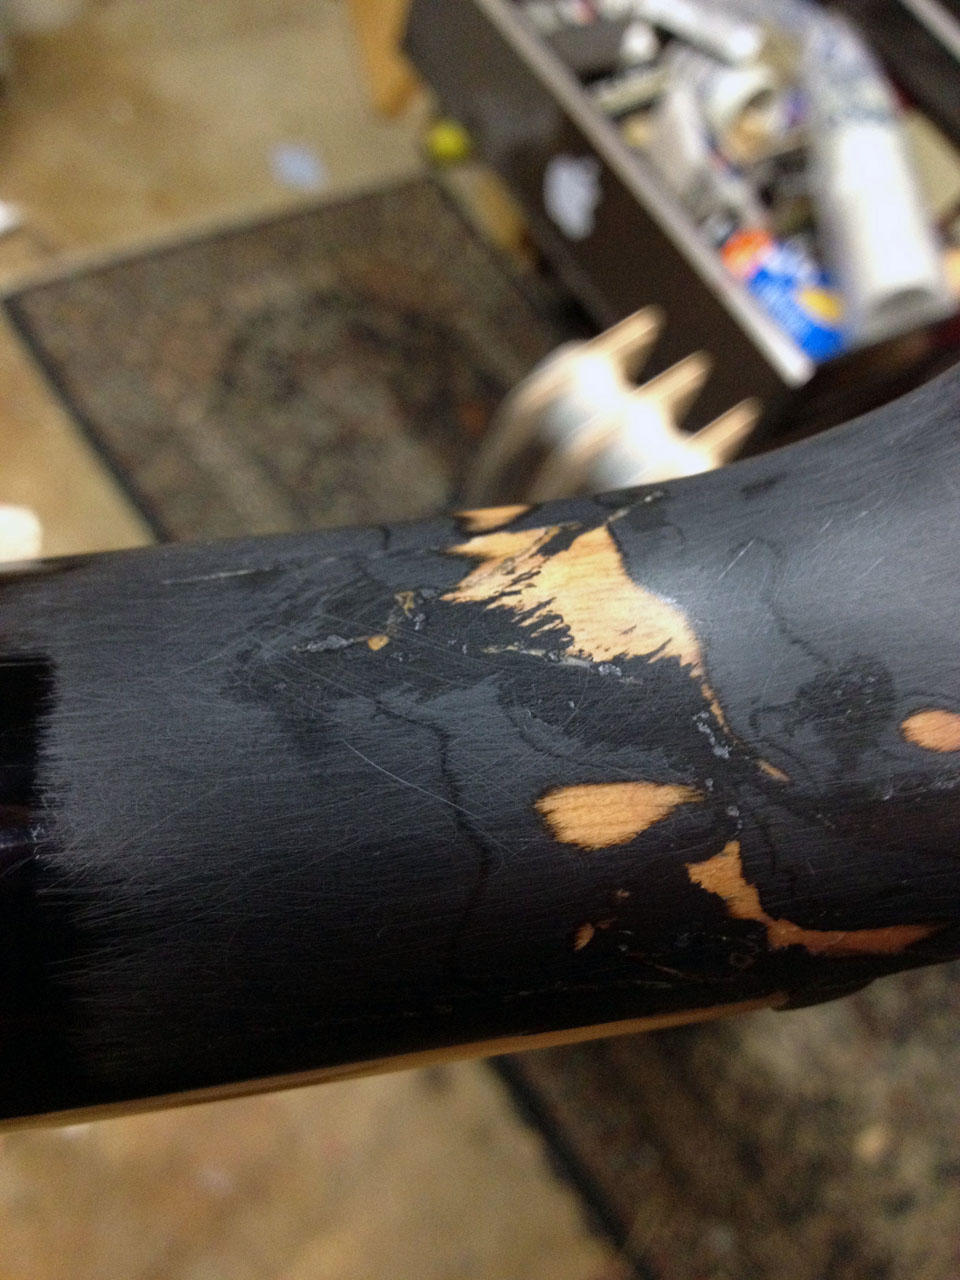
Finally, after a few coats of super glue as filler. This is where I will leave the neck unless the purchaser wants to pay to have it completely refinished. If it were mine, I'd sand the entire back of the neck down since I hate painted necks, but that's a preference.